setActiveItem( Ext.Component/Number/String newCard )
You can use this method from the controller to control the flow of the process basically telling the layout which container is made visible to the user. Here is an sample Order entry application that uses the Card Layout along with Grid Editing and custom buttons to demonstrate it capabilities.
   |
Step 1: Application starting point - index.html
<html>
<head>
<title>ExtJs 4 Card Layout Example</title>

<link rel="stylesheet" type="text/css"
 href="extjs/resources/css/ext-all.css">

<script type="text/javascript" src="extjs/ext-all-debug.js"></script>
<script type="text/javascript" src="app.js"></script>

<style type="text/css">
.icon-go {
 background-image: url(images/go.jpg) !important;
}

.icon-back {
 background-image: url(images/back.jpg) !important;
}

.icon-add {
 background-image: url(images/add.gif) !important;
}
</style>

</head>
<body>
 <div id="myExample"></div>
</body>
</html>
Step 2: Application JavaScript file - app.js
Ext.Loader.setConfig({
 enabled: true
 });


Ext.application({
    name: 'myApp',

    appFolder: 'app',

    controllers: [
                  'MyController'
              ],

    launch: function() {
     console.log("launch the application");
        Ext.create('Ext.panel.Panel', {
            items: [
                {
                 xtype: 'orderEntry',
                }
            ],
            renderTo: 'myExample'
        });
    }
});
Step 3: Panel containing the card layout - OrderEntry.js
Ext.define('myApp.view.OrderEntry' ,{
    extend: 'Ext.panel.Panel',
    alias : 'widget.orderEntry',
    height: 500,
    activeItem: 0,
    layout: {
        type: 'card',
        deferredRender: true,
    },

    // the panels (or "cards") within the layout
    items: [{
        id: 'card-0',
        xtype: 'panel1'
    },{
        id: 'card-1',
        xtype: 'panel2'
    },{
        id: 'card-2',
        xtype: 'panel3'
    }],
});
Step 4: Define the Panel containing Order Header Information - Panel1.js
Ext.define('myApp.view.Panel1' ,{
extend: 'Ext.panel.Panel',
alias : 'widget.panel1',
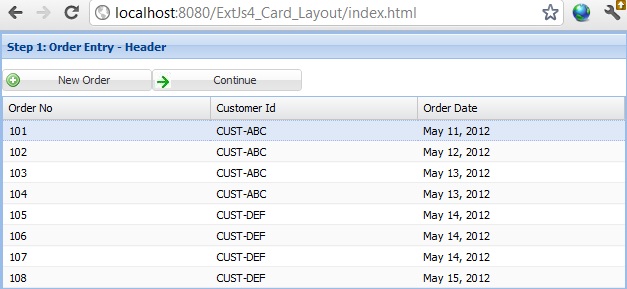
title: 'Step 1: Order Entry - Header',
items: [
{
xtype: 'container',
margin: '10 0 5 0',
layout: {
type: 'hbox'
},
width: 300,
defaults: {
flex: 1,
},
items: [
{
xtype: 'button',
id: 'add',
text: 'New Order',
iconCls: 'icon-add'
},
{
xtype: 'button',
id: 'continue',
text: 'Continue',
iconCls: 'icon-go'
}
]
},
{
xtype: 'headerEntry'
}],
layout: 'auto'
});
Step 5: Define the Order Header model - Order.js
Ext.define('myApp.model.Order', {
 extend: 'Ext.data.Model',
 fields: [
          'orderNo',
          'customerId',
          {
           name: 'myDate',
           mapping: 'inputDate',
           type: 'date',
           dateFormat: 'm/d/Y'},
          ]
});
Step 6: Define the Order Header store - Orders.js
var currentOrder = 108;

Ext.define('myApp.store.Orders', {
    extend: 'Ext.data.Store',
    model: 'myApp.model.Order',
    autoLoad: true,

    proxy: {
        type: 'ajax',
        api: {
            read: 'data/orders.json',
        },
        reader: {
            type: 'json',
            root: 'orders',
            successProperty: 'success'
        }
    }
});
Step 7: Sample data for the Order store - orders.json
{
    success: true,
    orders: [
        {orderNo: 101, customerId: 'CUST-ABC', inputDate: '05/11/2012'},
        {orderNo: 102, customerId: 'CUST-ABC', inputDate: '05/12/2012'},
        {orderNo: 103, customerId: 'CUST-ABC', inputDate: '05/13/2012'},
        {orderNo: 104, customerId: 'CUST-ABC', inputDate: '05/13/2012'},
        {orderNo: 105, customerId: 'CUST-DEF', inputDate: '05/14/2012'},
        {orderNo: 106, customerId: 'CUST-DEF', inputDate: '05/14/2012'},
        {orderNo: 107, customerId: 'CUST-DEF', inputDate: '05/14/2012'},
        {orderNo: 108, customerId: 'CUST-DEF', inputDate: '05/15/2012'}
    ]
}
Step 8: Grid Panel for editing and displaying Orders - HeaderEntry.js
Ext.define('myApp.view.HeaderEntry' ,{
    extend: 'Ext.grid.Panel',
    alias : 'widget.headerEntry',
    store : 'Orders',
    selType: 'rowmodel',
    plugins: [
        Ext.create('Ext.grid.plugin.CellEditing', {
            clicksToEdit: 1
        })
    ],

    initComponent: function() {

     this.columns = [
            {header: 'Order No',  dataIndex: 'orderNo',  flex: 1},
            {
             header: 'Customer Id',
             dataIndex: 'customerId',
             flex: 1,
             editor: {
                    xtype: 'textfield',
                    allowBlank: false
                }},
            {
                header: 'Order Date',
                dataIndex: 'myDate',
                flex: 1,
                renderer: this.formatDate,
             editor: {
                    xtype: 'datefield',
                    format: 'm/d/y',
                    minValue: '01/01/12',
                    disabledDays: [0, 6],
                    disabledDaysText: 'No weekends'
                }}
        ];

        this.callParent(arguments);
    },

    formatDate: function(value){
        return value ? Ext.Date.dateFormat(value, 'M d, Y') : '';
    }
});
Click here for next Chapter
No comments:
Post a Comment
NO JUNK, Please try to keep this clean and related to the topic at hand.
Comments are for users to ask questions, collaborate or improve on existing.